Monday, January 31, 2011

Mortar and Tile and Grout--OH MY!

Wowza.  This might be my favorite post yet because I'm starting to feel professional...

We have been working hard to transform this cart into a cool little kitchen, and it's all coming together!  I went to the Rebuilding Center (they know me by name now...) and picked up a hodgepodge of tile.  There was really no rhyme or reason to my selection other than I wanted them to be funky and different and random.

Mission Accomplished

As you can see, the wall is just a piece of plywood that was completely bare.  We applied a layer of mortar and then started laying ceramic tiles one by one.  I did a little pattern through the middle to kind of break it up and give the wall some texture.
Obviously, tiles had to be cut to fit on the wall and the angled ceiling.  Travis got pretty good at this!


After the tiles were all cut to fit, we were able to cover the entire wall and make our backsplash.  We then had to let it dry overnight and let the tiles set.

Grouted.

After the mortar dried, we applied grout which was also super fun.  The wall had a "finished look" almost instantly.  Grout is kind of tricky because it dries fast, so you have to apply it and then wipe it down right away.  And as you're wiping, it seems like it's just making it messier, but really, it's filling all the cracks and settling.  

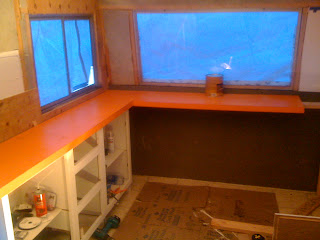
And of course, with the beautiful new tile, I couldn't possibly leave the countertops ORANGE...  After sanding them down, I painted them with a grey acrylic paint that cleaned up the whole look.  Check it out...


Not bad, eh?

Monday, January 24, 2011

What a Difference a Day Makes.

Beautiful Portland.

Sunshine
+
No Rain
+
No Wind
+
Above 50 Degrees outside
=
PERFECT DAY TO WORK ON THE GRILLERY!

This is our back wall with just insulation and hardboard.

This is the back wall after, with FRP.

All of our sinks will go in the back of the cart.  We put up FRP (Fiber Reinforced Plastic) because it is waterproof, easy to clean/wipe down, and brings the cart up to code.  FRP will cover most of the interior and will give the cart a facelift for sure.  To apply this, you have to sand the surface, apply mud/glue/adhesive to the inside of the FRP, let it dry for 30-45 mins, apply to the wall, then trim the entire thing with plastic seams.  (I'm getting quite good at all this random stuff...)

We got the front counter in for the service window.

Eeeeekkk...it's all coming together!  The counters were tough because the front of the cart is rounded.  Trav did a great job of figuring out the best way to cut them so they would sit flush against the wall.  Two counters up and this thing is starting to look like a food cart!


Our cabinets were this lovely peachy-cream color before I painted them "Winter White." 

We got the cabinets cut, sanded and painted just the way we wanted 'em, and the improvement was immediate.  Travis teases me that I lack vision because I have a hard time seeing beyond the dirt and grime (and sometimes the peachy cream exterior...), but I'm getting better!  I love what a little paint and new knobs can do...CHECK IT OUT.
Taaa-daaaa!

The best thing about these cabinets, is that they're FUNCTIONAL.  The counters fit nicely, and they give us some much needed storage.

It's all happening....


Wednesday, January 19, 2011

party time...

With all of the brainstorming, building, blogging and marketing, it was time to do some fundraising.  And FUN it was!
Element Lounge was the place to be!

Travis and I wanted to come up with a fun way to bring all of our friends together and raise some money for The Grillery as well.  Almost everyone we know LOVES a good party (or at least a good EXCUSE to party) so this seemed like a natural fit.  We promoted the event through Facebook, mass texting, mass email and word of mouth....and wouldn't you know it, this thing took off!!

Definitely couldn't have done it alone though...

The front door posse

Andrew on the 1's and 2's

I enlisted (a lot) of help from my friends to throw the best party in town, and judging from the feedback I got, that's exactly what we did!  After gathering raffle items (thanks Amy, Brandon, Brooklyn and Jill), buying a case of champagne, getting all my soldiers ready to work the door (shout out to Katia, Diona and Jill), and learning how to become a certified DJ (Andrew-you rock!)...we seemed to have a recipe for success!

I loved making my debut in the booth...(I may have missed my calling...)

Wouldn't be a party without the Reeders (And D!)

Packed the HOUSE!

It was such a great night and we will definitely be throwing more functions for people to come out and enjoy themselves...as well as learn a little more about what we're doing and our overall mission.  So far it has been a HIT!  

(Another HUGE thanks to AD for the wonderful pictures...you are a STUD!)


Monday, January 3, 2011

Bring on the New Year..

HAPPY NEW YEAR FROM THE GRILLERY FAM!!

2011 is going to be a GREAT YEAR!

These past couple weeks were tough, schedule wise, with the holidays and all the events taking place on the weekends...(see college basketball season starting and bowl games galore).  We managed to get some work done, but it was definitely 1 step forward, 2 steps BACK.

Our cart is old.  It's been through some stuff (although we're not exactly sure what...), so we need to completely re-do the outside and make sure every crease and crack is filled so that we don't get any water damage...  For those of you not familiar with the Great Northwest, all it does here is RAIN.  For months and months and months.  It's one of the reasons it is so beautiful here...it is also one of the reasons we're learning some things the hard way.  What better way to learn, huh??

This is how Travis does the dimensions for the walls.  I don't know how he keeps track, but they always fit perfectly!

We finally have all the walls up and we're ready to finish them with the FRP and Stainless Steel.  This will undoubtedly give the inside a whole new look!

Check out the videos below to see how I get down with a Power Saw...(SO FUN!)